
As much as we all enjoy walking into a store and purchasing the latest and greatest, there is a since of consumerism guilt that comes with it. How can you blend being able to purchase a new product without the guilt? The answer, the art of upcycling.
You would think that purchasing a set of end tables would be a trivial task, but I found it difficult as I couldn’t find something that in my mind provided enough value/function for the prices being asked. Most end tables all looked the same. They were wooden (or compressed particle board with a thin veneer covering) with 6 sides, a flat surface, and sometimes (if you were lucky), a drawer or door for hiding your mess.
Being a product development engineer and an avid DIYer, I thought to myself, “Surely there is a way I can make something unique and affordable without feeding into never ending cycle of consumerism”. This is where my muffler tables story begins.
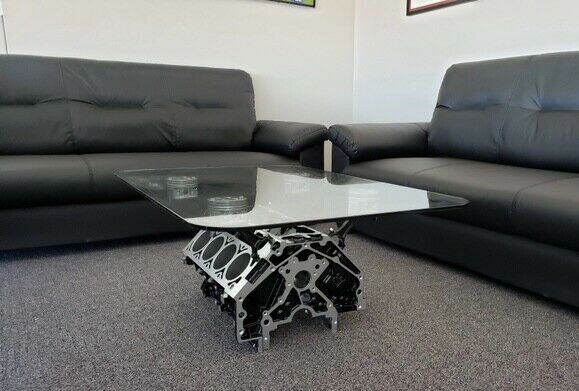
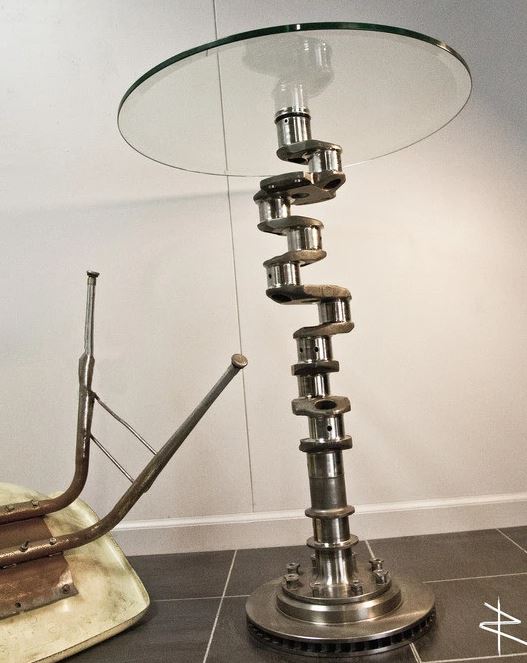
Having been pretty discouraged with my initial search for an end table, I decided to change up my search terms in Google to include things like “mechanical” or “recycled”. While there were only a few viable options, some of my favorites were the engine block coffee table and even crankshaft side table. The problem was that both required a large investment or having access to those specific components.
After spending hours trying to find the “perfect” solution and being unable to, I abandoned the search for a new end table.
Instead, I temporarily changed my focus to purchasing a “want” not a “need” for my car. That “want” being a new set of mufflers for my sports car. This only intensified my feelings of guilt as there was no need for my purchase and I was still left with the problem I had originally set off to solve. How can I obtain a set of cool looking end tables that didn’t break the bank and didn’t create waste?
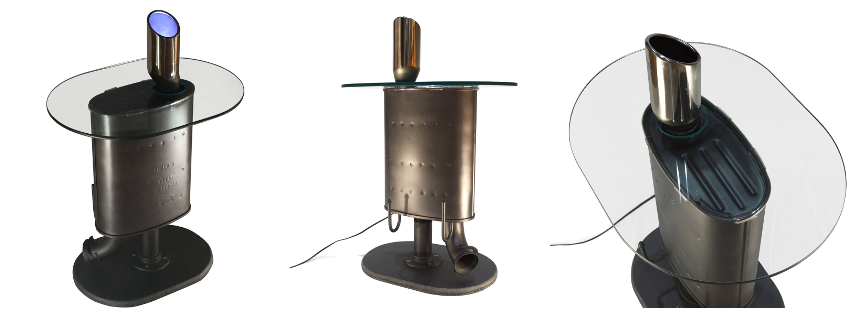
After installing the new mufflers, and with the old stock mufflers in hand, I contemplated their fate. Seeing as there was very little aftermarket for stock mufflers, I couldn’t bring myself to trash them. Just because they didn’t serve a purpose for my car anymore didn’t mean I couldn’t find another use for them. It was then that it finally hit me, “What if these became my end tables?”.
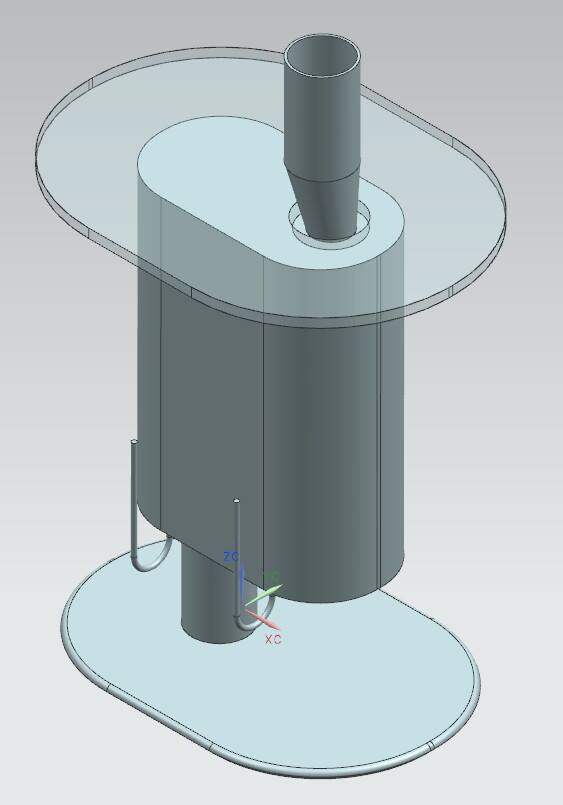
The next 2 weeks were a whirlwind. Between spinning up a CAD model, making a couple of drawings, to sourcing the materials through local vendors, I was hooked.
After iterating through a couple of design ideas and asking for some feedback from my fellow friends and coworkers, I landed on a CAD prototype that I really liked.
The next step was to create a MVP (minimal viable product) and confirm that my 3D models matched the customer requirements of mine (unique and cost effective end table).
First, I had to figure out how to get the muffler to stand up on its end. With a little bit of googling I was able to find some large diameter floor flanges connected by a threaded nipple that allowed me to invert the muffler. A quick trip to the local plumbing supply store and $50 later I was in business.
Once standing (and wobbly because it was just sitting on the flange), I utilized a large old carboard box to make some templates to validate the portion sizes of both the glass top and base.

One area I was concerned about was how large to make the base so that the end table could remain sturdy and balanced when on different types of surfaces (carpet vs hardwood).
I didn’t want the base to be larger than the glass top (from an aesthetic standpoint) but I also didn’t want to inhibit the functionality of the end table.
After a couple of mockups, and airing on the side of safety, I made a prototype out of MDF and bolted the muffler down to it. To my excitement, it met my aesthetic needs and didn’t comprise any stability or functionality.
Having had some experience with using a router, I decided I could add a nice little radius to the top edge around the perimeter of the part to prevent any toe hazards I may have created and also add to the parts overall appearance and perception of quality.
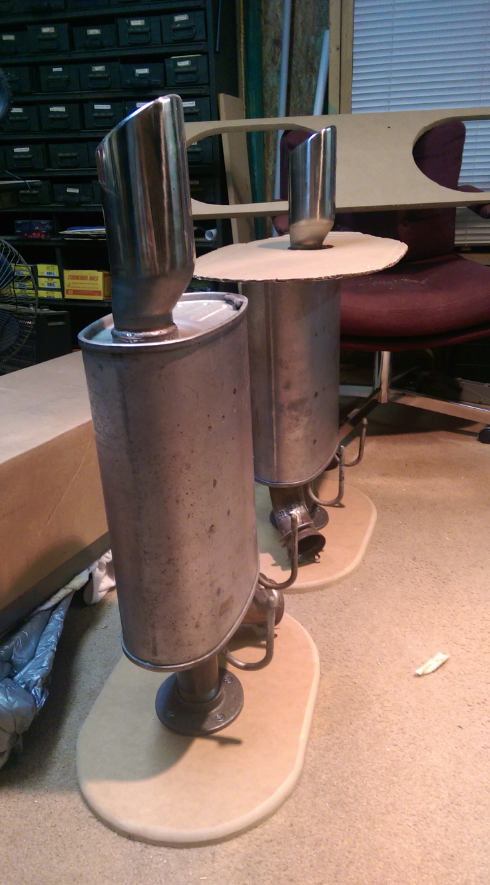
Overall the factory mufflers looked pretty rough. The sheet metal surface of the mufflers had already begun pitting from being exposed to a winter season in Chicago and I wanted something a little bit more clean looking. I tried to remain as cost effective as possible, so I picked up 2 cans of gray spray paint from my local hardware store and got to work. After 2 coats or so of spray paint (and having taped off the tail pipes to maintain their chrome appearance), I was pleased with the outcome. The end result hid all the surface imperfections previously visible and didn’t cover up the stamped in Ford part numbers which I felt helped it maintain its authentic feel.

Note to future DIYers, try and spray paint in a non windy area and not against the wind. In my haste, I found out quickly that not following those rather obvious and simple steps resulted in a splotchy and messy spray job on the first coat.

With the mufflers mounted and painted, we were on to the final steps (the glass top). This part proved to be the most difficult as I had to try and find someone local who was willing to sell me a custom sized piece of glass that would fit my design requirements. I wanted a thick piece of glass, as opposed to plastic, as I believed it would provide a more rigid structure from which I could place objects onto. After calling around, I was able to find a laser and water jet company who had a 1/2″ thick sheet of glass (non tempered) that they were willing to cut up for me (as they were about to scrap it) for $50 since it provided them something fun to do and learn about if they were capable of providing in the future for other customers/projects.
One quick email with a drawing for them to reference for dimensions and a week or two later I had my parts! Turns out, water jets really don’t cut glass well. The trick the shop ended up discovering was that they couldn’t pierce the glass (that is just shooting the water at the glass). They instead had to start the waterjet off the side of the plate glass and then work it’s way onto the sheet glass. Seeing that my glass top had a opening for the tail pipe inside of the oval shape created a challenge and resulted in a large amount of scrap. For all those who are considering a similar project, you should just avoid this headache (for both you and your supplier) and just go with a plastic top.
Speaking of which, a couple years after this project, I dropped the glass tops while moving and ended up switching to a 3/8″ thick acrylic top. It was a lot more expensive then my original glass version ($225 vs $50) but certainly lighter, more durable, and most importantly safer (as non tempered glass tends to break off in large pieces).
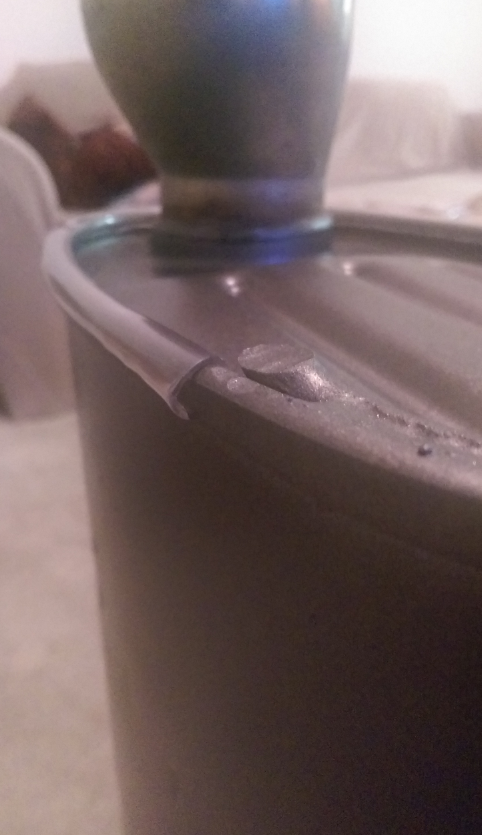
There was one last small detail, however, that I had to solve in order to mount the glass top. And that was what to do when the glass (or now plastic) top would inevitably rub against the metal muffler. Having had some exposure to sheet metal edges while working at Navistar, I sought out some kind of edge guard. Unable to find some kind of off the shelf solution, I settled on tediously splitting open some small tubing I bought that did the same trick. The end result was a nice barrier that lifted the glass just enough so that it wouldn’t rub against any metal on the muffler.
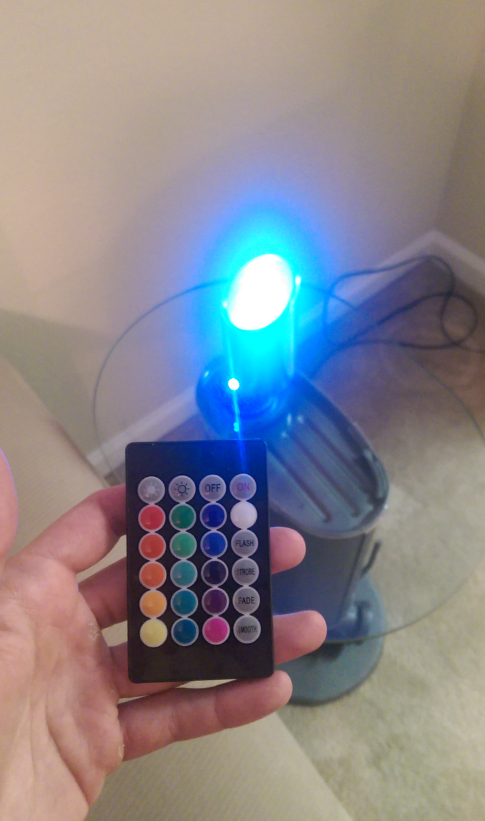
My father once said that all my projects had one thing in common, they all had blue LEDs in them. So to continue the trend, and to add a hidden light fixture that would also minimize the need for a lamp, I purchased a cheap LED light bulb with remote and mounted it inside the tailpipe with the wire coming out the bottom. Fishing the wire through the muffler was a little bit tedious but it eventually came through and I sealed it off with a rubber grommet to protect the wire from the sharp edges on the muffler.
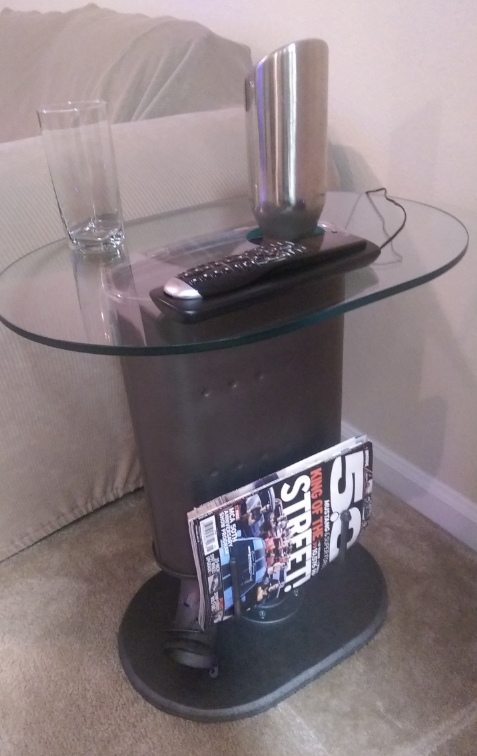
When everything was done and sitting beside my couch, I was proud of what I had accomplished. I was able to successfully upcycle my old mufflers and turn them into a pretty cool conversational piece for my apartment. It met my aesthetic, functional, and budget requirements and helped save the planet from another item being thrown in the landfills.
Did I mention it also came with a free magazine holder? The old metal hooks that were previously used to help hang the muffler to the underside of my car served as a perfect book/magazine holder and was a nice bonus when it was all said and done.
If you made it this far down into the post then kudos to you! I hope my story of how I built my end tables (which I still use today) inspired you to find a way to reduce, reuse, and recycle/upcycle something in your life and find a second life/purpose for something before you throw it out.